# Getting Started with RoMonitor
TIP
Joining a RoMonitor Team? Follow the instructions here.
# Creating a Dashboard
# Creating your Account
Firstly, visit https://romonitor.silicon.digital/register and follow through the instructions given to you. You'll then be taken to the dashboard setup.
# Choosing a Vanity
A vanity URL is a unique URL for your RoMonitor dashboard, you'll also use this in your game. Typically developers use their studio names. For this example we're going to use the studio name Space Studios.
Space Studios can claim the vanity URL https://space-studios.romonitor.silicon.digital/.
# Vanity URL restricted?
We have a predefined blacklist of vanity names that cannot be taken for legal or technical reasons. If you feel your vanity has been blacklisted by mistake contact us using the feedback popup on the RoMonitor dashboard when you're setup.
# Joining a Team
# Installing the Module (Optional)
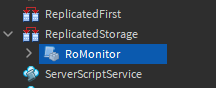
Once you've downloaded the RoMonitor Module Script from the RoMonitor Setup or from your RoMonitor Dashboard just simply drag the file into Roblox Studio. Move the imported RoMonitor Module Script to anywhere accessible by the server, we reccomend using ReplicatedStorage.
You can then do in any Server Script the following that will initiate the RoMonitor functionality
local RoMonitor = require(game.ReplicatedStorage:WaitForChild('RoMonitor'))

RoMonitor.initiate()
That's it, you'll now be able to use all of the helper functions we provide.